2009年7月15日水曜日

最近は毎日毎日雨。
ただの雨じゃないくって、すざましい雨。作業場も畑も溺れそう・・・
とにかくお風呂が届いて、早く中に入れたいけど、お風呂場の床ができてない。
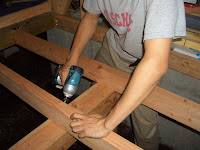
まずお風呂場の長さを測って、余った木材を切って、縦に打ち込む。それをまた余った木材で下から支えるように、打ち込む。
こんな感じ。


次に根太を横に何センチかごとに打ち込んで、こんな感じになる。
その上にはリビングの床と同じように合板を打ち込む。周りの壁には断熱材を入れて、床の壁を防水シートで囲む。
あとで排水に繋げるために穴は開けておいて、パイプをとりあえず突っ込んでおく。


仕上げはこんな感じ。


あとはモルタルを引くだけでいいと思っていたけど、(いいのかもしれないけど)、知り合いに防水シートだけじゃなにかと心持たないから、FRPというサーフボードなどを作る素材で床を作ったらとアドバイスしてくれた。余ったFRPのシート(ちょいとぼろぼろ)も貰ったし、あとは材料をMusashiで買ってやってみた。
これがこの家作りを始めてから一番最悪の経験になるとも知らず・・・
まず、FRPの色が大介が間違えてものすごい色のブルーを買ってしまった。返すにはMusashiは遠いし、上にモルタル引けばいいかと思い、その色で作業をすすめた。
そしてFRPはとんでもなく臭い。シンナー(?)の臭いかな。なんか、もう頭クラクラで気持ち悪い。しかもFRPはものすごくベトベトする。そしてすぐ乾いてしまうらしいから、急がないといけない。さらにもらった古いシートはぼろぼろだから、くっついて上手くFRPを塗れない。ものすごい色の青のFRPが体中にくっつき、臭いに頭がクラクラになり、何ともいえない苛立ちと気分の悪さ。
真ん中が凸凹になってしまい、良くないと思いながらも、もうどうしようもない。なんというものに手を出してしまったんだろうと二人で思いながら、とにかくはやく体を洗いたい一心でその日は引き上げた。
そして次の日、3時間で完全に乾くはずのFRPがまだベトベト。そしてまだ臭い。雨が降っているせいか、硬化剤が足りなかったのか、わからないし、直しようもないまま、とてつもない臭いの中家の作業を進める。

そして、あげくの果て、やっぱり真ん中が凸凹なのは問題だ・・・と様子を見に来てくれた知り合い。水がそこで水たまりになって流れなかったら、家の床とか、柱とか、蒸発したら天井とかが腐るらしい。家が一番早く悪くなる理由は水周りの問題。凸凹があるくらいならFRPしないほうが良かったねっと言われた。
あぁーーーーあ。
あの苦しみはいったいなんのために・・・
そもそもあんなに体に悪いものは環境にも悪いに決まってる。環境を考えて建ててる家なのに、なんで使ってしまったんだろう。お風呂の床の防水力をなるべくよくして、お風呂を早く完成させたいという気持ちが焦りを生んだのだろうか。あのFRPの青い色を見るたびに自分に対する腹立ちと、水周りの問題をどうするかで苦悩している。

とにかく、モルタルをできるだけ上手に塗って、床に傾斜をつけるように頑張るしかない。
夢のお風呂を中に入れる日はまだまだ先のよう・・・トッホホ。

Recently, we have been getting a lot of rain, everyday.... everyday.... My garden and our cabin construction site is drowning from it and we are stuck in the house and although we appreciated the break for a while, are getting quite bored of it.
Now that my dream bath has arrived, I am anxious to get it indoors into the bathroom. So, we started working on the bathroom floor. We used left over wood to make the floor as seen in the pictures above. Nothing too complicated, just like the living room floor.
We were instructed to put in the boards and then to cover the floor and half the wall with the water-proof tybec sheets we used for the outer walls. All seemed easy enough and after leaving a whole in the floor for the drain and a pipe that we can cut later, the floor was done quite quickly.
We planned to put some cement in on top of that, and call it a finished floor. But our recent friend advised that we could put in FRP to make the floor more water proof, since cement alone tends to leak. He had some old sheets of glass wool sheets for the FRP which were pretty worn out, but we had no idea what we were getting into, and were grateful for his advice and bought the materials and got to work.
The first shock came at the color of the FRP. Daisuke was tired or something, and bought a bright neon blue color FRP. FRP is often used to fix up surf boards, but I wouldn't have chosen this color even for a surf board. But, it was too far and too much trouble to exchange it at the store we bought it and we figured we can cover it with the cement that we had bought anyway, and got to work.
The second shock was the horrendous smell. I am sure this stuff is pretty toxic, cause after a few minutes of laying it down, I was feeling all dizzy. Plus the old sheets that were given to us kept sticking to the roller and things weren't going well at all.
But, there was no stopping since the instructions said this stuff hardens very quickly, and we were anxious to get finished with the awfully stickly and smelly job. Hard as I tried, I could not get the FRP to become completely flat, and so in the end, we had a bumpy finish in the middle. That, and a very dizzy, sticky, pissy, and probably high wife (that would be me) made us both want to be finished and out of the house.
I have never been high in my life, but this was probably as close as I have ever gotten to it. As much as my head hurt from the foul smell, I was obsessively fighting the little bumps that kept coming up no matter how much I fought it and no matter how much Daisuke told me to leave it.
Of course, the bumps mean trouble, and our friend who suggested it said that maybe it was better if we hadn't done it at all... which was disappointing after going through all of the horror mentioned above.
All we can do is make the cement cover as best we can and put a solid slope to it so the floor won't be full of puddles. That and hope for the best I guess.
I don't know why we decided to use such a thing that is probably bad for our health and the enviornment, but in our haste to finish the floor and to make it as best we could, we took the advise that is probably very good advise for people who know what they are doing. I don't know if I would try this again, but next time I do think I could do a better job... that and I would prepare a gas mask to do it.

2009年7月8日水曜日

窓 Windows

冬もキャビンを使えるように、窓は断熱性の高い二重になっているものをTres Homesを通してアメリカから輸入した。
キャビン作りの計画中に窓は輸入に時間がかかるから、去年の秋から決めて、一番最初の買い物だった。それが先日窓枠も完成して、ちょうどいいタイミングで届かれた。そしてこの窓が重いのなんの!どうしようと思っていたけど、大介父も手伝ってくれて、窓の片方を外すと随分軽くなって、3人で持ち上げることができた。
窓枠にスッポっとはめるとインパクトでサッシに付いてる穴を通して窓枠に繋げる。あとは防水テープで周りをタイベックに貼って、水の浸透を防ぐ。
気をつけるポイントと言えば、あんまりないけど、サッシの周りの外側にタイベックが乗るようにしたほうがいいから、はめ込む前にタッカーで止めた部分を外して(以下の写真)、入れる時に上手くタイベックを外に出す感じかな。

窓を入れてさらに家らしくなってきた。
外からの写真:
壁も着々と進んでるでしょ?

中はこんな感じ。

窓も入って、大介が目標としている、カマドウマが入ってこない家にもう一歩近づけたかな。:)


We imported our windows from the US, since the windows are better winterized and prices are reasonable. We ordered them last fall, and after we finished the window frames, the windows were delivered to us. To enjoy the outside green, we have a lot of windows in our small cabin ;)
Putting in the windows is not so hard, but the windows are reallllly heavy. We managed to put them in by taking one of the glass sides out, and also getting the man-power help from Daisuke's father. After we heave them into place, all we had to do was drill them in with the impact driver, and put water proof tape around the sides to keep the rain out. We were able to put most the windows in, but the ones for the upper section of the house need some more work with the framing, and we are going to wait for some professional advise on that.
Now that the windows are in, the cabin is looking more and more like a livable house. Although the windows seems larger and more open before the windows went in, we are very happy with our windows and the fact that they will keep the bugs out and the warmth in once the cabin is done.

2009年7月2日木曜日

樽風呂 Barrel Bath

お風呂は最初からこだわりたかったからいろいろ探した。五右衛門風呂とか、木のお風呂とか、ドラム缶まで考えたけど、やっぱり木のお風呂がいいと思っていた。ヒノキのお風呂はとても素敵だけど、とても高い。なら樽のお風呂なら安く手に入るかなーと思っていたけど、ネットで探してもあまりないし、しかもあるものは20万以上する。どうしよう、どうしようと考えている時に、家族で山梨に旅行に行った。辺りにはワイナリーが沢山あり、お店にはワインの樽をテーブルなどに使っていた。もしやと思い、その樽家具はどこで手に入れているのかを聞いたら、近くに樽職人がいると言う。さっそく尋ねてみたら、ガラス工房の裏に樽に囲まれたおじさんが一人、小松さんがいた。

樽をお風呂にしたいと言う話をしたら、大丈夫だよと言ってくれて、値段も聞いてみたら、これがまたびっくりするくらい安くって、その場で売ってくれるようお願いした。でもこれは去年の秋で、まだまだ家作りも始めてないから、また春に来るということになり、ものすごく素敵な出会いにワクワクしながらその場を去った。
そして家作りが開始してから、また小松さんに連絡をして、今はワインだけじゃなく、ウィスキーの樽があると知った。ワインのお風呂もいいけど、一人で入るのが精一杯。ウィスキーなら二人で入れるくらい大きくって、しかもワインの樽と同じ値段で売ってくれるという。早速山梨に行って、樽を見に行った。それがまためっちゃカッコいい樽で、いい香りで、もう、大興奮。小松さんといろいろお話して、長野には業者に頼んで送ってもらうことにして、お金を払って、ついにお風呂をゲットした。小松さんは本当に素敵な人で、またぜひ会いたいと思う。家が完成したらお風呂入りに来てくれるといいな。
長野に戻って2週間後くらいに樽が家に届いた。


綺麗に加工されて、樽の部分と切った上の部分を両方が届いて、周囲がウィスキーのいい香りがただよって、わたしは嬉しさで爆発寸前。水も入れて、最初はちょっともれたけど、すぐに木が膨らみ、まったく水漏れしなくなって、想像以上に素敵なお風呂になりそう。早く浴室を完成して、水道工事しなきゃ!!

I knew from the start that I wanted a nice bath for the cabin. Not just any bath, but something special and unique. I thought of traditional Japanese wooden baths, or even drum cans, but as a researched around, I really liked the idea of using a wine barrel. However, I found that wine barrels are hard to find in Japan, and are very expensive, so I was half given up and was pondering other ideas. Late last year, we went to Yamanashi (near Mt. Fuji) and visited a few wineries in the area. I noticed the wineries had a lot of furniture made out of old barrels and asked where they get them. They told me there is an old man who fixes up barrels in the area, and we quickly went to go visit him. Behind a glass factory, was a small section with piles of old barrel pieces and barrels and an old man working alone. We asked him about the possibility of making a barrel into a bath and he said it should work fine and he has made them before. I was so excited I almost jumped out of my skin. I was also worried about the price, especially since this barrel bath would be hand made, but the price was much much much cheaper than any other wood bath I looked into.
Since it was fall, and the cabin building hadn't started yet, we told him that we will contact him again in the spring, and left the site. A few months ago we called him, and he remembered us, and he told us that not only did he have wine barrels, but he also had a few whiskey barrels that would be bigger and make a nicer bath. The price (surprisingly) was the same, so without hesitation we asked for the whiskey barrel, and stopped by his workshop on the way back to Tokyo one weekend. We talked to him for a while, decided on shipping methods, paid for the barrel, and two weeks later it arrived in Nagano. I can't be more happy with how incredibly amazing this barrel looks and what a great bath it will make. It still smells like whiskey, I could get drunk just by taking a bath.

2009年6月23日火曜日

外壁工事 Outer wall construction


何日も切っては塗っての繰り返し後、いざ壁打ち開始!
まずは、壁の一番端っこがまっすぐになり、合板の横から雨が入らないように、長細い板を打ち込んで、ステインを塗った。(実はこの板が細すぎと言うことがあとで判明するんだけど、またあとでもっと太い板を加工して貼ることにする)。
そして、一番下の段は上から合板を貼った時に防水シートが見えないように、ベタッと横に長く色付きの合板を土台に打ち込む。
その上に切った合板を1cmくらいの隙間を入れながら並べて打ち込んでいく。これで一列目終わり。

その上に合板を打てるように胴縁を下地として打ち込む。合板が大体45cmだから、合板の半分の22cmところで打ち込んでいくと言うやり方なんだけど、合板をいろんな長さで切ってしまったため、22cmだとたまに下の防水シートが見えてしまうことが分かり、胴縁は16cm毎に打ち込むことにした。

そして次の列を打ち込んでいく。

これで2行目終わり。

この作業をひたすら繰り返す。たまに長い合板を入れたり、短いの入れたり、細いの入れたり、幅の広いの入れたり、色々バランスよくしたり、悪くしたりして、とても楽しい作業。下の防水シートが見えないようにだけ、気をつけて、あとは自分の好きなように入れていく。合板の木の質もいろいろだから、同じステインでも色が薄かったり、濃かったり、木の模様があったり、なかったり、とてもおもしろい。
半分終った状態がこれ。

そして、一つの壁の完成がこれ。

横から見るとこんな感じ。

想像以上にかっこいい壁ができて大満足。様子を見に来てくれた近所のお友達も“アートだね”っと言ってくれた。断熱材といい、壁といい、私達はパズルアーティスト!?嬉しい限りですね。

あと、この作業にあたって、ものすごい助けになっているのが、エアーガン。コンプレッサーとエアーガンを貸してくれている中村さんに、大大大感謝です!!本当にこの道具がなかったら、気の遠くなるような作業が何倍も大変で途方に暮れるところでした。ありがとうございます!!

After days of cutting up boards and painting and drying, we are finally ready to put up (at least part of ) the outer walls. First, we put in thin and long boards on the edge of the walls so that we can put up the cedar shake type boards in nice and straight and rain won't hit the sides of the boards once they are up. (we later discover that these boards had to be thicker, but we will just all on another thick board later).

Next, we nailed in the bottom board. We put in this board so that when the first layer of cedar shake boards go up, you won't be able to see the paper sheets in between the boards. On top of this bottom board, we nailed in the cedar shake boards, leaving about 1cm between the boards. This will be the first layer of the wall.

On top of the first layer, we hammered in another long and thin board so we have a piece of wood to hammer the cedar shake boards into the wall. We put these long boards in every 16cm (we first thought of doing it every 22cm, which is about half the length of the cedar shake, but since we cut it up pretty randomly, some were too short for 22cm, so we went with 16cm). Then we continue with hammering in the cedar shake boards.

Since each board is different in length and color and even in texture, it was a lot of fun putting up the boards randomly and according to our taste. We thought the more random the better so we put in some long ones, and short ones, thick and skinny, dark and light.

Once all the cedar shake boards were up, the end wall looked really cool, and much more interesting than we had imagined. A friend who stopped by said it looks like an art piece and we were really pleased and proud of ourselves. Daisuke and I just stood back and admired the wall over and over, and couldn't stop complimenting ourselves for our 'artistic' work :)

*Many thanks to Mr. Nakamura for lending us his air-gun and air-compressor. This process would take forever without it.

2009年6月17日水曜日

外壁準備 Outer Wall Prep


外壁には廃材の合板を使う。これもまたTres Homesの鹿島さんがいろいろ提案してきて、最終的に合板を使って、シーダーシェイク風に仕立てることになった。シーダーシェイクは米杉板を瓦調に引き裂いたもの。うちは合板を使うということで、名付けてシーダーフェイク!
まずは合板を45cmの長さに切っていく。幅はさまざまのほうが面白いから、細いのから太いのいろいろ。長さもちょっとバリエーションがあるといいから、長いのも短いのも作った(短いのはあとで実は使い難いことが分かるけど・・)。
これが切ったあとの写真。結構いっぱい切りましたが、まだまだ、これから沢山作ります。大介が切っている間、私はステインを縫っていく。本当のシーダーシェイクは米杉の色が綺麗で耐水性が強いから、ステインは入らないんだけど、やっぱり合板だから、ステインが色も綺麗にしてくれるし、耐水性を高めてくれる。ステインの色はオークウッド。塗らないほうが木が呼吸するらしいんだけど、塗るメリットのほうが大きかったから、塗ることにした。濃い目の色のほうが、前にあったキャビンぽいし、合板のちょっとした汚れがごまかせると思ったから。
合板を塗るのはとても面白い。ぜんぜん駄目そうな板が、ステインを塗ったらすごく面白い模様が出てきて、色も綺麗に付いたり、逆に良さげな板がステインを吸い込んじゃって、ぜんぜん駄目だったり、縫ってみないと分からない。
数日切っては塗っての繰り返しでこんだけ、完成させることができた。

下の写真のように、外壁を打ち込んでいく予定。さて、外壁のどれくらいができるか楽しみ!
For the outer walls, we will use the wood boards that we used for the floor, but ones that were thrown out at construction sites as garbage. We thought about different methods on what to use and how to make the outer walls, and finally decided on making the walls with these wooden boards with cedar shake style. Since we aren't actually using cedar, we decided to call our method, cedar-fake.
We cut up the boards into about 45cm lengths and made various length widths. As Daisuke cut up the boards, I painted the boards with oak colored stain. Since we aren't using real cedar, which doesn't need stain because it already has a nice color and is pretty water resistant, we decided to paint the boards. Not painting them may be more ecological, but the boards aren't exactly pretty, and they aren't water resistant so the boards could be susceptible to water damage.
A few days were spent with simply cutting and painting the boards and in the end we had a nice pile. The last picture is how we plan to put together the boards on the wall. The boards we cut up won't be enough to finish all the walls, but we look forward to seeing what it will look like when we put it up.

2009年6月16日火曜日

床の合板 Floor boards

廃材も入って、床作りの第2ステップは根太の上に合板を張っていくこと。下の写真のように、すっぽっと板と板が繋がるようになっているんだけど、これが以外と大きい合板を上手く入れるのが難しい。左の方が入ったと思ったら、右が出てきちゃったり、どこかが引っ掛かって、ちっとも入らなかったり。最初は結構手こずったけど、途中から最初に斜めに入れると結構上手くいく事に気づいて、ちょっとは順調に入るようになった。あとは、気合で叩いて入れるだけ。
合板が入ったら、根太はあるところにインパクトでネジを打ち込んで固定する。
こんな感じでどんどん下の断熱材が見えなくなって、なんかちゃんとした床っぽくなってくる。
2日程かけて引いた合板を張り終わった状態をチェックしに来た監督の愛犬チャウ。
どうやら合格らしい :)
合板張る前は入りたくても、入るとどこにでも歩き回っちゃうチャウで、
断熱材の下の紙が取れちゃうと困るから、立ち入り禁止にされてたけど、
今は走っても、飛び回っても大丈夫!
キャビンの中で昼寝もできる!昼寝大好き夫婦

最後に一部だけ、合板は打ち込まないで、秘密の地下(?)の入り口を作り事にした。
何かと収納スペースになるかなと思ってます。
大介が頑張って、秘密の地下倉庫の扉枠を作ってくれた。
だんだん大工っぽくなってる?!
After putting in the insulation, we layed down the wooden boards on top of the wooden joists. The top pictures shows how the boards are made to connect perfectly. It was actually kinda difficult to put these together. When hammering in the left side, the right side comes out, or with just one small section not fitting, the whole darn thing doesn't hammer in. After a few boards, we figured out that putting the board in on a slight angle helps put the board in without getting stuck. Still, some of the boards were slightly bent, and in that case, we just had to use force and hammer the board in as best we could.
In the end, we were able to put in the boards quite nicely, and ChowChow, our dog and the director on-site, can now walk around freely in the house. Plus, we can now bring in our sleeping bags and take naps during break time :)
Daisuke also made the frame for a secret door we are going to make to open up into the floor. I thought it would be useful to have access to the open space under the house for storage, since there wont be much storage space in the cabin itself. Daisuke is becoming a better carpenter day by day and it's fun coming up with ideas as we work on the cabin.


2009年6月15日月曜日

床と断熱材 Floor Insulation

シートも貼って、よっぽどの事がない限り、とりあえず雨と風は凌げるようになったので、中の床の作業に取り掛かった。

断熱材はこの前運んできた大量の断熱材の破片(?)と言うか現場で残った細かいピースを使おうという作戦だけど、通常床の断熱材はちゃんと板に一本ずつ打ち込めるような大きさである。私達が使うのはとてもじゃないけど、そんな事はできない。そこで、いつもアイデア豊富なトレスホームズの鹿島さんの提案通り、床の根太と柱の下に防水シートをタッカーで打ち込んで、細かい断熱材の乗せるベッドのような感じに作った。


その上に、床の柱の上に縦に45cm毎、根太を入れていった。根太は後で合板を上の乗せる時に必要であり、床を安定させる。その上にパズルみたいに一つ一つの小さい断熱材のピースを上手く埋めていく。

これは時間は掛かるけど、本当にパズルみたいで、とても楽しい。ちょっとした隙間に絶妙な感じに一つのピースが入る時の快感はなんとも言えない。もちろんきっちり入らないことが多いので、隙間に合わせて断熱材を切ったり、最後はグラスウールを千切って詰め込んだりした。


この作業は数日掛かったけど、藤木さん親子も寄って手伝ってくれたり、Kantaがすごく頑張って手伝ってくれたから、順調に作業が進んで、拾って来た断熱材の廃材もほとんど使い切る事ができた。この床の断熱材の完成度は、私達にとってアートのようで、すごく気に入っている。合板で隠れて見えなくなるのが残念。

Now that we have paper walls to keep the wind and rain out, we started work on the floor. Since we got a whole lot of insulation peices from the warehouse, our plan is to peice together all the random peices and make it into the floor. In order to do this, we had to put in the paper sheets we used for the walls under the wooden logs of the floor. This way, we made a bed-like place for all the little peices to rest on.

This was a long and detailed process, but a lot of fun to put together. It really was like doing a gigantic puzzle, and we were able to use peices of insulation of quality that we could otherwise not afford, for free! We were happy that we used up almost all of the insulation 'garbage' and more than anything, we are proud of our floor insulation that we consider a masterpeice, and its too bad that we are going to cover it up with the floor boards later.