2009年6月16日火曜日

床の合板 Floor boards

廃材も入って、床作りの第2ステップは根太の上に合板を張っていくこと。下の写真のように、すっぽっと板と板が繋がるようになっているんだけど、これが以外と大きい合板を上手く入れるのが難しい。左の方が入ったと思ったら、右が出てきちゃったり、どこかが引っ掛かって、ちっとも入らなかったり。最初は結構手こずったけど、途中から最初に斜めに入れると結構上手くいく事に気づいて、ちょっとは順調に入るようになった。あとは、気合で叩いて入れるだけ。
合板が入ったら、根太はあるところにインパクトでネジを打ち込んで固定する。
こんな感じでどんどん下の断熱材が見えなくなって、なんかちゃんとした床っぽくなってくる。
2日程かけて引いた合板を張り終わった状態をチェックしに来た監督の愛犬チャウ。
どうやら合格らしい :)
合板張る前は入りたくても、入るとどこにでも歩き回っちゃうチャウで、
断熱材の下の紙が取れちゃうと困るから、立ち入り禁止にされてたけど、
今は走っても、飛び回っても大丈夫!
キャビンの中で昼寝もできる!昼寝大好き夫婦

最後に一部だけ、合板は打ち込まないで、秘密の地下(?)の入り口を作り事にした。
何かと収納スペースになるかなと思ってます。
大介が頑張って、秘密の地下倉庫の扉枠を作ってくれた。
だんだん大工っぽくなってる?!
After putting in the insulation, we layed down the wooden boards on top of the wooden joists. The top pictures shows how the boards are made to connect perfectly. It was actually kinda difficult to put these together. When hammering in the left side, the right side comes out, or with just one small section not fitting, the whole darn thing doesn't hammer in. After a few boards, we figured out that putting the board in on a slight angle helps put the board in without getting stuck. Still, some of the boards were slightly bent, and in that case, we just had to use force and hammer the board in as best we could.
In the end, we were able to put in the boards quite nicely, and ChowChow, our dog and the director on-site, can now walk around freely in the house. Plus, we can now bring in our sleeping bags and take naps during break time :)
Daisuke also made the frame for a secret door we are going to make to open up into the floor. I thought it would be useful to have access to the open space under the house for storage, since there wont be much storage space in the cabin itself. Daisuke is becoming a better carpenter day by day and it's fun coming up with ideas as we work on the cabin.


2009年6月15日月曜日

床と断熱材 Floor Insulation

シートも貼って、よっぽどの事がない限り、とりあえず雨と風は凌げるようになったので、中の床の作業に取り掛かった。

断熱材はこの前運んできた大量の断熱材の破片(?)と言うか現場で残った細かいピースを使おうという作戦だけど、通常床の断熱材はちゃんと板に一本ずつ打ち込めるような大きさである。私達が使うのはとてもじゃないけど、そんな事はできない。そこで、いつもアイデア豊富なトレスホームズの鹿島さんの提案通り、床の根太と柱の下に防水シートをタッカーで打ち込んで、細かい断熱材の乗せるベッドのような感じに作った。


その上に、床の柱の上に縦に45cm毎、根太を入れていった。根太は後で合板を上の乗せる時に必要であり、床を安定させる。その上にパズルみたいに一つ一つの小さい断熱材のピースを上手く埋めていく。

これは時間は掛かるけど、本当にパズルみたいで、とても楽しい。ちょっとした隙間に絶妙な感じに一つのピースが入る時の快感はなんとも言えない。もちろんきっちり入らないことが多いので、隙間に合わせて断熱材を切ったり、最後はグラスウールを千切って詰め込んだりした。


この作業は数日掛かったけど、藤木さん親子も寄って手伝ってくれたり、Kantaがすごく頑張って手伝ってくれたから、順調に作業が進んで、拾って来た断熱材の廃材もほとんど使い切る事ができた。この床の断熱材の完成度は、私達にとってアートのようで、すごく気に入っている。合板で隠れて見えなくなるのが残念。

Now that we have paper walls to keep the wind and rain out, we started work on the floor. Since we got a whole lot of insulation peices from the warehouse, our plan is to peice together all the random peices and make it into the floor. In order to do this, we had to put in the paper sheets we used for the walls under the wooden logs of the floor. This way, we made a bed-like place for all the little peices to rest on.

This was a long and detailed process, but a lot of fun to put together. It really was like doing a gigantic puzzle, and we were able to use peices of insulation of quality that we could otherwise not afford, for free! We were happy that we used up almost all of the insulation 'garbage' and more than anything, we are proud of our floor insulation that we consider a masterpeice, and its too bad that we are going to cover it up with the floor boards later.

2009年6月12日金曜日

防水シート Paper Tent

久しぶりのアップです。作業は順調に進んでいるのですが、最近翻訳の仕事に追われて(そうなんです、一応少々仕事をしているんです)ブログのアップをする気がなかなか起きませんでした。すみません。

さて、廃材集めで走り回っている時に、長野にあるシンニッセキと言う木材屋さんで防水シートを割安でゲットしました。その防水シートを貼る作業を2日ほど完成させました。特に説明はないのですが、使う道具はタッカーとカッター。とにかくタッカーはいっぱい打ち込むようにする。シートがピシっと貼るのはちょっと大変で、数人で作業するのがベスト。


南の島での生活なら、防水シートを貼るだけでもきっと生きていけると思う。防水、防風、防湿なので、貼り終わってからは家の中がとても快適になり、床ができたら昼寝を家の中でできるような感じになりました。

Please excuse the long break in posts. I have been busy with translation work (yes, unfortunately I am doing some work on the side) and I couldn't bear facing the computer longer than necessary.

So, while collecting materials, we stopped by a lumber store and purchased water and wind resistant paper sheets for a very reasonable price. We spent about 2 days wrapping the cabin with this paper. There is not much explaining to do with this process; just needs a tacker and cutter and lots of staples. It's a bit difficult to put on the sheets without making them all wobbly, so its best to do this process with at least 2 people.

If we were living on a tropical island or desert, our cabin will practically be livable with just these sheets. Its almost like a huge tent, and once the cabin was wrapped in paper, it was very comfortable inside. We look forward to having the floor in so we can take our naps inside our cabin :). 

2009年6月3日水曜日

廃材集め Usable Garbage

窓枠が終ってからの数日,Nさんが屋根をやってくれている間、廃材集めであちこちまわった。まずはお世話になっているトレスホームズの倉庫。ここは廃材の宝の山。ここからは外用のドア2つ、中用のドアも2つ、断熱材いっぱい、グラスウールの断熱材も。あとは古いブルーシート、合板、バケツ、などなど。あと、工事中の現場にも行って、さらに断熱材と合板をゲット。最後に屋根をやってくれた中村さんの倉庫からも断熱材、家具にできそうな木材いろいろ、それ以外にももう使ってないカナヅチとか、ネジとか、ペンキとか、書き切れないほどの宝物をいただいた。本当にみんな沢山のお宝をありがとうございました!!


廃材集めに欠かせないのが、軽トラ。これもトレスホームズのKさんに紹介してもらった、信濃町の山内自動車で8万円でゲット。車検もあと1年残っていて、Hondaのアクティーで、ものすごくお買い得。憧れの軽トラが手に入ってウキウキです。でもマニュアルをほとんど運転したことがないから、最初がガッタンガッタンで車酔いしまくった。廃材集めも手伝ってくれた友達のタイソンが運転の仕方も教えてくれたので、今となってはずいぶんスムーズに運転できるようになった。

ありがとうタイソン! この時に他にも手伝ってくれたブラッド、ハナちゃん、麻衣子さん、本当にありがとう。またきてね!

After finishing the window frames, we spent a few days running around collecting usable materials that would otherwise be thrown away. First we went to the warehouse of Tres Homes, our contractor. This place is simple overflowing with hidden treasures. We got 2 outdoor doors and 2 indoor doors, wooden boards, insulation boards and glass wool, buckets, etc. We also went to a few constructions sites to get more wooden boards and insulation, and finally went to the storage place of the person who helped will do our roof, Mr. N's storage where we collected all kinds of stuff ranging from nails to paint to wood that we can later make into some killer furniture.

One necessity in collecting usable garbage treasure is a truck. We got a truck for a great deal (about $800) at a local dealer. It is a Honda and this kind of white mini truck is very common in Japan. Its small but very useful and easy and cheap to maintain. We don't have much experience with driving a manual so for the first few days, there was a lot of explosions and engine stalls, but our good friend Tyson, who helped us collect stuff, also gave us instructions on how to drive the manual (without making the passengers sick). Lots of thanks to Tyson, Maiko, Brad and Hana for coming up and helping. Hope you come again soon! 

2009年6月1日月曜日

窓枠 Window frames

筋交いを全部打ち終って、次を窓枠を入れていくんだけど、前回書き忘れた一つのステップがあるから、一応ここで写真で紹介します。これは大介のパパが担当してくれたんだけど、全部の柱にカスガイを打っていく。これは柱と土台を繋げるため。いろいろと家を固定させていくのに小さく、大事なステップが重なっていくもの。

そして、窓枠作り。窓が入るところの間柱を、窓が嵌るサイズに測って、切ってから枠を入れていく。もちろんのことだけど、ちゃんと作らないと窓がビシッと入らない。今までの作業は、板が多少短くなりすぎたり、真っ直ぐにならなかったりしても、多少頑張って打ち込めばごまかせたけど(実際ごまかしてるし)さすがに窓が届いて、入らないと困るから、今回はあんまりごまかせない。

まず、窓の大きさ高さはとりあえず一緒にしてるから、一気に線を引くのに墨つぼを使う。墨つぼって職人が使うとビシっと線が入るんだけど、私達がやってもあんまり線が柱に着かなくって、何回もやってるとなんとなく毎回ちょっとずれて、せっかく測ったのに、ぶれちゃって、あんまりうまくいかなかった。とにかくがんばって窓が入る上の部分と下の部分に線を二本ずつ入れる。二本の線の幅は3cm。そして、丸ノコで5mmの深さで線の上を切っていく。これが丸ノコが重いから結構まっすぐ切るのが大変。かなりの筋トレになる。

切った間の木をノミで掘る。この作業は楽しい。みんなでノミの取り合いになってた。

間柱もちゃんと入れないといけない。間柱はキャビンの壁全部に45cm間隔で入れていく。これは前回と一緒だけど、窓の上の部分と下の部分を別々に作ってはめ込む。そして、その上の部分と下の部分の間にさっき掘った所に横板(窓枠の長さに合わせて間柱を加工したもの)を通して、全部の間柱と横板をビスで固定する。最終的にこういう感じに仕上がり、ちゃんとできていたら、窓が届く時に綺麗にここに嵌るはず。嵌らなかったどうなるんだろう・・・これがホントのオープンハウス、って感じになるかも。


私達が筋交いとこの作業をしている間、大工さんたち(Fさん親子)はものすごい速さで屋根の準備を進めていく。あっという間に屋根全体にコンパネ(針葉樹合板)が貼られて、ついでに煙突まで作ってくれた。大感謝です。


最後にベランダの骨組みの組み立ての写真をアップし忘れてたので、ここでアップします。ベランダの柱はプレカットじゃないから、Fさん父が加工してくれた。すごい技術だと思います。柱はめっちゃ重いです。Fさんたちがいなかったら、本当に持ち上げるのは無理でした。

Fさん親子は全部で3日間一緒に作業してくれました。その間にキャビンが形になっていき、そして私達もいろいろ教えてもらいました。丸ノコを使うのすら初めての私たちに丁寧に説明してくれて本当に感謝しています。Fさんは私達の師匠だと勝手に思っています。一緒にスズメバチ退治したり、揺れる足場を固定したり、楽しかったです。道具もいっぱい貸していただき、すごく助かっています。本当にありがとうございました。これからもよろしくお願いします!

Before talking windows, the first picture is a step I forgot to mention before. It's basically a big U shaped nail connects the beams and posts. Small steps like this help to make the frame nice and sturdy.

Next we worked on putting in the window frames. Because there are support beams every 45cm, for the areas that we will put in windows, we had to cut the middle of the posts so that the windows will fit. We also had cut into the beams on the side so that the slate of wood for the bottom and top of the window frame will snugly fit into the wall. We used a chisel for this process, which was a popular tool and we all fought for our turn to use it. 

The window frame took us about 3 days to finish, and before that, it was the carpenters last day with us. Before they went, we put up the beams for the porch, which I was able to catch few pictures of. This beams are super heavy, and we would never have been able to put up this house if it wasn't for the help of the carpenters. They also put up the bottom boards of the roof with unbelievable speed. Our very special thanks for Mr. F and his son for all their help. Mr. F is an exceptionally skilled carpenter and is Daisuke and my new hero. Not only was he very skillful, he did so much for us in the three days and really taught us a lot. We feel very lucky to have had the opportunity to work with him and his son and hope we can have some sake with them when we finish this cabin :)

2009年5月25日月曜日

骨組が終った後は、足場作りをしなければいけない。屋根屋のNさんが使ってない足場を貸してくれると言ってくれたので、遠慮なくお借りすることにした。

ついでに、余ったヒノキの破材もあるから使っていいと言われて、これもまた遠慮なくもらいました。

まだブログに書いていなかったかもしれないけど、今回のキャビンはなるべく廃材を使って建てようというテーマがある。建築産業からでる廃材の量はかなり半端ない。アメリカではゴミの40%くらいが建築産業からでるゴミから出るというのも読んだ事がある。廃材といっても、けして使えないものでない。ちょっと傷がついたものとか、木材を切ったあとの残る部分とか、単純に余るもの。全部特に問題ないものだけど、基本的に新築する時はみんな新品がいい訳で、小さく余ったものは使うのに手間が掛かるから使わない。もちろん工務店の人たちもこういうものを捨てるのももったいないと思うから、結構倉庫の中に使われないままおいてある。だから、使ってほしいと言ってくれるし、こっちとしてもすごくありがたい話になる。エコの家を建てるというテーマで考えても、ゴミになる物を使うというのは、だれでもできる事だし、一番無駄と無理がない気もする。

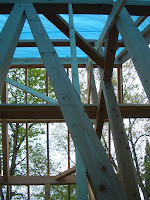
足場を組んだ後は、大工さんたちが屋根の工事を始めて(私も一回屋根に上ったけど、かなり怖かった・・・)私達は筋交いの作業を教えてもらって、それに取り組んだ。写真のように、柱の間に斜めに筋交いを入れていく。これがちょうどはまるように計るには、筋交いを入れる枠の縦と横の高さを測って、その比率で切る角度を決める。

たとえば、230cmと80cmだったら、サジガネ(直角定規)を使って、23cmと8cmを直角に測って8cmのラインを一直線に書いてから、そのラインの真ん中から、また直角にラインを書く。よく分からない説明になちゃったけど、まー実際にやってみないとこういうのは分からんものだ。


ちょうどフィットする(はず)の筋交いを入れて、ビスで固定したら、筋交いを支える間柱を作る。間柱をキャビンの周りの45cm単位で入れていくんだけど、筋交いがあるところには、筋交いが邪魔で入れられない。だから、筋交いが間柱を通るところを切らないといけない。これは単純に間柱を一回入るところまでいれて、筋交いにあたるところを鉛筆で線を書く。その線を筋交いの太さ分切って、これもまたちょうどフィットするようになる(はず)。この間柱の真ん中を丸ノコで切るのがなかなか最初は難しかった。あとは、間柱の上の部分が梁や桁に差し込めるように3cm角の突起状に加工する。

テトリスのようなもんですな。最終的にこんな感じにぜんぶ収まる。


この作業をキャビンの窓や扉が入らない場所全部やるから、3日くらいこの作業に費やした。次の作業は窓枠作り。お楽しみに!

Before moving on with the construction of the walls, we had to put up the footings (not sure what its called officially). This is so we will be able to reach the higher parts of the outer walls as we work. Mr. N, who will be doing our roof kindly let us borrow the parts for the footings and while we were at his warehouse, he also said he has some nice quality wood pieces that can be used for the inside walls. Although they are small pieces, their quality is fine and since he has no use for them, he said we can have it for free. So, of course we piled those in the truck and took it back with us as well. 

Although I haven't mentioned it yet, we are trying to use as much recycled material and/or materials that would otherwise be considered garbage. Lots of materials go to waste in the construction business, not because they are unusable, but simply because they have a slight stain or scratch, or are basically just left over from the construction site. And, of course, since most people don't want their house built from left over material and also because its probably more work than its worth for the construction workers to collect and use left over parts, everything is bought new and in bulk. So, the warehouses of these construction companies are filled with usable materials that they feel bad about throwing out since its usable, but also can't use for their new projects. They are happy that we can get it off their hands, and we are super happy since we get materials for dirt cheap or free. I once read that the amount of garbage that comes from the construction business is about 40% of the total garbage produced in a year in the US. So, if we can make use of these materials that will otherwise just be thrown out, it is both ecological and it keeps our purses happy.

After we put up the footings, the carpenters worked on the roof (I went up on the roof once, and it was quite scary so we will leave that to the professionals) and they taught us how to make the rest of the walls. Like I mentioned before, we are using Japanese style building methods, and with this style, we put in wooden post sideways to fit exactly between the posts to strengthen the walls. Once one goes in sideways, we also put another post in the middle (this kind of post will go up every 45cm of the walls), so the sideways post is now in the way, so we have to measure and cut the middle of the rod, so the sideways one once again fits exactly inside the middle rod. Its kinda hard to explain, but the pictures should make it clearer. The top of the middle rod is cut into a 3cm square and this fits exactly in a hole that was made earlier on top. Technically, everything is supposed to fit snugly together so in the past they didn't have to use nails. We are not quite as skillful so we hammered in nails after we put everything up, just for extra support. We had to do this process for every 45cm all around the walls, except for where the windows and doors will go. Since we are sloooowwww, (especially since we were still just getting a hang of the circular saw) this step took us about 2-3 days to complete.

Next time, I will talk about how we will make the window frames. Stay tuned :)

2009年5月22日金曜日

道具 Tools

(English follows Japanese)
キャビン作りは日に日に進んでいるけど、今日は工事に使っている道具の紹介をしようと思います。まずは丸ノコとゼットソー。

注)危険ですので絶対に真似しないでください。

丸ノコがあれば、大抵の事はできます。着こなしのポイントはいかに重さを感じさせずに片手で扱うかです。間違ってもカットするライン上に体を置いてはいけません。ゼットソーはその名の通り刃の部分がZになっている鋸です。

次に紹介するのは墨つぼ。これ一つあればまっすぐな線を引くことに困ることはありません。

お次は角度を演出するアイテム二点。これだけで持っていると切ない感じになります。

注)危険ですので絶対に真似しないでください。

沢山ビスを打つ場合の必需品、インパクトドライバー。これがないとすべてのネジを締めるのにに数年かかってしまいます。

注)危険ですので絶対に真似しないでください。

次はノミ & ハンマー。ノミは窓枠や間柱を差し込むための隙間を作るのに使います。ハンマーは釘を打ったり、加工した木材を組んだり、その他力ずくでなんやかんや押し込んだりするときに使います。蜂を追い払うために振り回したりもできます。絶対に必要な一品です。腰に下げているだけでおしゃれ度アップ!

注)危険ですので絶対に真似しないでください。

こちらはDekai丸ノコ (正式名称不明)。持ち運びはできませんが、まっすぐに切ったり、角度をつけて切ったり、安定して使えます。

注)危険ですので絶対に真似しないでください。

他にも色々使うけど、作業中はこんな感じに軽いものはベルトに着けてます。袋の中には釘がわんさかです。

最後に弟のジミー君が作った作業台。丸ノコを使う際の必需品。作業台に向かうときは常に笑顔を絶やさず。大工さんなんかはこんなの使わず、至る所で丸ノコ振り回してるけどね (笑)。

こんな感じで色々な道具を駆使して、毎日コツコツと作業を進めてます。次回はさらに進んだ骨組みをアップするので、期待して待っててね!

PS-協力してくれたモデルのために突っ込みのコメントをお待ちしています。(ソフィア)

Today we will quickly introduce the tools we are using. It's really quite self explanatory, basic tools like the circular saw, impact driver, hammer, chisel, and measuring tools all demonstrated in the pictures above on how NOT to use them. The large monster saw was left behind by the friendly carpenters for us to borrow and Jimmy (my little brother) built a sawhorse.

Next time we will post more on the framework that we have been working on for the past few days. Stay tuned!