2009年9月23日水曜日

トイレ お風呂の準備 Bathroom Prep

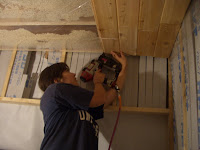
水道工事をやる前に(トイレを入れる前に)トイレの床を入れたほうがいいと言われ、さっそくトイレの床と天井を作った。トイレは面積が狭いから、ここにも貰った床材の廃材とロフトで使った木材の余りを組み合わせて使った。大体同じ長さだから、3つほど合わせるとちょうど床と天井の長さくらいになって、これを他の部屋と同じ様にのりを付けて、ステイプルガンでバッシンバッシン打ち込んで固定していく。狭いおかげで結構すぐに完成。


ほかには樽風呂の下に、水が抜ける穴を入れた。ウィスキー樽はものすごいゴッツイ木を使っているから、穴をあけるのも結構大変。普通のホールソーを使えばそんなに難しくなかったかもしれないけど、私達は(分からないから)いろいろサイズを入れ替えできると言う、じつは非常に使えないホールソーを買ってしまった。これはサイズを変えられるのはいいのかもしれないけど、まったく頑丈さがなく、すぐに壊れてしまうし、威力もないからなかなか穴をあけるのにも時間がかかった。


でもなんとか穴をあけて、削られた木からはさらにウィスキーの香りが広がった。あー、はやくこのお風呂が使いたいなーーー

Before we put in the toilet, we were advised to put in the floor of the bathroom (so we won't have to work around the toilet to do so) so we did that right away. We had left over wood from the wood we used in the loft, and also some other random floor wood we got from local carpenters. We were able to connect about 3 peices to make the length of the floor and ceiling, and after that, all it took was some glue and the staple gun to keep it in place in the floor. Since the bathroom is nice and small, we were able to get this done quite quickly.

We also finally opened a hole in the whiskey barrel to let the water out of it when we take a bath. The wood of the barrel is super thick and hard so we had a hard time opening the whole. It may not have been so hard if we had a decent hole saw, but we got a crappy one (the kind that you can change the sizes and is as flimsy as paper) since we didn't know better. This piece of s--- would break and had no power what so ever so it took a while to open the whole, but finally it was done and the wood smelled again of fresh whisky. Ohhh I just can't wait to take a bath in it!!!

2009年9月18日金曜日

ドア枠 (建具) 作り Door Frame

最近はめっきり秋らしくなり、夜は羽毛布団を被らないと寝られない程寒くなってきました。大分前になるんだけど、家の外側の完成度を上げるためにドア枠を作りました。枠だけ作ったは良いけど、ドアはまだ取り付けてません。だって邪魔になるんだもん。

普通ドアっていうものは、ドア枠とセットになって買ってくるものだけど、うちの場合トレスさんの倉庫に眠ってた中古のドアを使うので、ドアに合った枠を自分達でつくらなくっちゃいけない。

これが意外と面倒な作業。うちはちっさい家の癖に入り口が二箇所ある。片方の入り口 (勝手口?) の方はすんなり作れたんだけど、メインの方はそうは行かない。なぜかというと、メインのドアの横幅が、ドアが入るべく作ってある開口部 (柱と柱の間) よりも広いから。勝手口の方のように、通常であれば、ドアのサイズに合った枠を作って開口部に嵌めればいいんだけど、メインの方は開口部の内側アンド外側に、半分枠が浮き出た形で上手い具合に枠を嵌め込まなきゃならない。これを作るのには大分苦心しました。

ドアのチョウバン(ドアが開く時に支点となる方)が付く方は、開口部の内側に入れちゃうからそんなに大変でもない。まずヒノキのプレーナー材をドアの高さと枠の上下の部分を組み込む幅を足した長さに切ります。次に閉めた時にドアが当たる、戸当りを作るため、丸ノコを使って木材からドアの厚みの分 x ドアが当たる分を削り取ります。


最後に上下の部分がきっちり収まるように両端に細工をします。これで一辺完成。


次に上下の枠を作ります。チョウバン側は開口部に収まるから良いけど、ドアノブ側は開口部から出っ張っちゃうから、こんな変な形のものを作らなくちゃいけなかった。写真はステインを塗った後のもの。


ドアノブ側は完全に開口部の外にでるから、チョウバン側の外壁部に出っ張ってる部分=ドアの厚さに木材を切っておしまい。

4 辺が全部できたから組み合わせ準備 OK!と思ったら計算間違えてて上下の枠の長さが足りないという事実が発覚・・・ショックを受けつつも目立たないように木片を木工用ボンドで繋げて、なんとかごまかします。一辺ずつ開口部に嵌めて・・・


完成!作り終わっちゃうと、なんであんなに (2日間) も悩まされたのだろうと思うくらい目立たない存在になっちゃいました。


これはやってる本人にしか分からない苦労なんだな、きっと。


The weather is becoming cooler everyday, and the hints of autumn are all around. It was a while back, but Daisuke made the door frames for the house (although we aren't going to attach the doors yet, since it will just get in the way).

Supposedly, most doors come with the door frame as a set, but since we scavenged our doors at the Tres Homes warehouse and got them for free, there was no such convenience (as usual). Although our house is quite small, for some reason we had decided on having two doors. (I don't remember why now... why oh why... maybe it was to have easier access to the bathroom in case of emergencies..) Any, one of the doors was a normal size so we were able to make a frame that fit right between the beams no problem. The other door (to become our main entrance) is a beautiful green door that gave Daisuke many a headaches. The reason being is that it is too big to fit between the beams of the wall, so he had to make a frame that would stick out from the wall, and yet support the big (and heavy) door. Oh, the number of hours and days he spent staring at the door and wall and pondering how he will put the darned thing up. But, finally he got it done somehow, (I am not quite sure what he did, because I chose to stay out of this battle) and the frame is up and ready for the door!

2009年9月9日水曜日

雑用 Random Busy-ness


最近はめっちゃ頑張ってます。
本当です。やる事がいっぱいで、たまに頭がこんがらがっています。マジで。

今、沢山の作業をやっているのだけれど、なかなか完成している作業がないので、ブログに書きづらい部分があります。
たとえば、外壁は永遠にやってるけど、まだ終ってません。合板を切って、ステインして、乾かして、二度塗りして、また乾かして、そして壁に打ち込む。
この作業を何日もちょくちょく、着実に進めていて、今は4つ目の壁が終りそうです。写真は以下。
ちゃんと完成してから全体の写真をアップしたいものです。


他になにをやっているかというと、これがまたかなりの手間のかかる作業で、何日もかけてやっています。
それは天井に使う野地板の下準備。野地板はとても安い木材で、まったく乾かしていないもの。杉を切って、そのままお店に並ぶ感じ。
そのため、かなりウエットで、そのうちすごく縮んでくるらしい。あと、私達が買ったのは本当に一番安いものだったから、表面もザラザラ。
さすがに予想以上にざらざらだったので、またまた藤木さんに頼んで、電動カンナを貸していただいた。
全部で240枚ある野地板を一枚一枚電動カンナで削って、そして太陽に下に並べて、干した。240枚も・・・
夜は雨とか霧が多かったから、毎日外に干したものを中に運び入れて、朝にまた出して干すの繰り返し。かなりの筋トレ。
安い木材はその分、労働が必要ですな。
野地板を削って出た木くずがあまりに多かったので、両親のキャビンの玄関までの道に引いた。

削って乾かした野地板はこんな感じになる。木っぽくって、わたしは好き。

そして、最後にこの240枚の板をVatonって言う内装用のステインを塗った。内装は木の感じを残すためにステインは透明にした。
この作業も家の中でしかできないから、ステインして、一日乾かして、そして他のも塗る。夜遅くまで二人で、最初は歌など歌いながら、後半は無言でひたすら塗りまくった。


そんな感じで、地味な作業だけれども、忙しく過ごしています。そして、毎日クタクタです。こんな暮らししていて、あんまり言える立場ではないけど、
休みてーーーーー。

Daisuke and I have been keeping super busy lately. There is so much work to do, we hardly know where we should start and when it will ever end.
Alot of the work we have been doing lately is very tedious. I love our outer wall, but my god, it is taking so much time to do. We are still working on the forth and final wall.
The picture of the fourth wall is the above, and we are almost done with it, and I want to put up the final pictures of the finished walls soon... when it happens.
Having to cut the plywood boards, stain it, dry it, stain it again, then nail them into the walls... its all fun but really... never ending... But the great thing about doing this house project is that everyday we can see that we make progress, and compared to the work we used to do in offices, we can see the work becoming closer to the end product with every board we stain and every nail hammer.

Another big and tedious task we have been keeping busy with is drying the wood that we will use for the ceiling. This wood is pretty much the cheapest you can find in Japan, and part of the reason is because they basically chop the tree down, slice it up, and put it in the stores without drying them. So, they come pretty wet, and not exactly pretty. Plus, the wood we got was really rough, a little too rough, that we decided to borrow a electric sander from the carpenter who is lending us so much of his wonderful tools (and we thank him with a big bottle of sake each time :) ). So, the process of sanding down the wood, all 240peices of them, then laying them out to dry, and carrying them in and out of the house day after day (when sunny) has been keeping us quite busy and giving us a pretty good work out. Like many things, the price of the wood was cheap, but we payed for the difference with our labor.

The picture above shows how we covered the path leading to my parents cabin with all the sawdust that came out of the sanding, which I think looks kinda nice.

After the wood was dry, we stood them up inside and stained them. We chose a clear stain for the inside, since we wanted to keep the color of the wood. Daisuke and I stained at night after the sun went down, and we stained all 240 pieces. One by one by one by one...... We would usually start the night of staining with music from the iPod and us singing along, but after a while we would both fall silent and just stain stain stain as if we were in a trance. But like the other work, if we keep at it, eventually it ends, and now we are ready to put up those darned peices of wood into the ceiling!

2009年8月31日月曜日

お風呂天井 Bath Ceiling


やっと夏のシーズンが終わり、長い夏休みも過ぎ、作業開始しました。やる事が山ほどあって、どこから手を付けるか迷いながら、ちょくちょく進んでます。4つ目の外壁も少しずつ完成に近づいているし、断熱材もちょくちょく入れている。
今日はお風呂の天井の作業を紹介します。お風呂は木のお風呂にこだわった分、やっぱり壁も木がいいと思っていたら、なんとめっちゃクオリティーの高いRed Cedar(米杉、ヒノキ科)の廃材が屋根工事をしてくれたNさんが沢山くれた。これがまたすごーく香りがいいのです。
この廃材も一つ一つ長さが違って、結構短いんだけど、なんとかうまくロフトの床の根太に貼ることができた。
まずお風呂は湿気が多いから、ロフトの根太に防湿シートを貼って、その上に床下カラッと言う乾燥剤を撒いた。これは体と環境に害のないもので、半永久的にもつらしい。


その下からロフトの床を張る時に使った、エアーステープルでバンバン根太に廃材を打ち込んでいく。廃材の間には一応木工用ボンドを塗っておいた。

バラバラの長さを慎重に選んで、ほとんど廃材を切らずにフィットさせることができた。

これで風呂天井完成。とてもいい感じで、ヒノキの香りがなんともいえないくらい最高。


We couldn't do any construction work during the summer season, but now that the season is over we are back to hammering away the outer walls and putting in insulation. The season was fun with all the people (usually there is hardly anyone around). Lots of tennis and golf and swimming in the lake, but toward the end, Daisuke and I were pretty tired of play, and ready to get back to building.

One thing we finished recently is putting up the bathroom ceiling. We used Red Cedar pieces that Mr. N gave us that were left over and sitting in his warehouse. It has a great scent and is the strongest kind of wood you can find against moisture. Japanese wooden baths often use this type of wood, so the scent is very much like a Japanese traditional bath place, which is absolutely awesome.

We put up moisture prevention sheets and a natural moisture observer under the loft floor, and used the air-stapler we borrowed to nail in the little and random pieces of cedar wood. We put a little glue between the pieces to help it stay in place, but we mostly very carefully chose the pieces so that we hardly didn't cut any of the them to make it fit perfectly in the ceiling. The process was very quick (thanks to the air gun) and we couldn't be happier with the way it looks (and smells!)

2009年8月17日月曜日

ロフトと天井 Loft and Ceiling

夏休みに入ってからは、周りに迷惑になるので、工事はできないというルールがあって、最近は遊んでばかりいる。でも一応ちょくちょく進めているので、久しぶりにアップします。

大工さんに来てもらった時にロフトの作り方を教えてもらって、ロフト作りに取り組んだ。ロフトの根太に使ったのは2x10(スプルースという木を、縦横が2インチx10インチに切ったもの。長さは関係ない2x10を柱と柱の間の長さに切り、その間にもネジを打ち込めるように45cm単位で2x10を入れていく。

先に電気工事をやってしまっていたので、電線が通っている所に2x10に穴をあけて通すことにした。2x10を全部並べるとこんな感じに仕上がる。


この上に床用の木材をホチキスみたいなエアーガンで下の2x10に打ち込んで固定する。


半分終った状態をロフトの上から。

終った状態がこれ。


天井の断熱材もロフトを入れてから入れた。天井と断熱材の間にちゃんと空洞ができないと湿気がたまって断熱材がぐちょぐちょになるらしい。そのため、ちゃんと空気が通る空洞を天井と屋根の間に作って、壁にもその空気が抜ける穴も作らないといけない。
こんな感じ。


これを知らないで断熱材をいれると大変な事になるらしい。断熱材はふわふわしてるから、下手に押し込んで入れてしまうと、結局空洞が詰まって、湿気が溜まる。天井の断熱材はかなり気を使って入れなければいけない。もちろん、断熱材がないと、夏はめっちゃ暑くなってしますし、冬も暖かい空気が全部逃げてしまう。家の空気の流れなどを考えて作るのはとても大切なことらしく、とても勉強になった。

2009年7月15日水曜日

最近は毎日毎日雨。
ただの雨じゃないくって、すざましい雨。作業場も畑も溺れそう・・・
とにかくお風呂が届いて、早く中に入れたいけど、お風呂場の床ができてない。
まずお風呂場の長さを測って、余った木材を切って、縦に打ち込む。それをまた余った木材で下から支えるように、打ち込む。
こんな感じ。


次に根太を横に何センチかごとに打ち込んで、こんな感じになる。
その上にはリビングの床と同じように合板を打ち込む。周りの壁には断熱材を入れて、床の壁を防水シートで囲む。
あとで排水に繋げるために穴は開けておいて、パイプをとりあえず突っ込んでおく。


仕上げはこんな感じ。


あとはモルタルを引くだけでいいと思っていたけど、(いいのかもしれないけど)、知り合いに防水シートだけじゃなにかと心持たないから、FRPというサーフボードなどを作る素材で床を作ったらとアドバイスしてくれた。余ったFRPのシート(ちょいとぼろぼろ)も貰ったし、あとは材料をMusashiで買ってやってみた。
これがこの家作りを始めてから一番最悪の経験になるとも知らず・・・
まず、FRPの色が大介が間違えてものすごい色のブルーを買ってしまった。返すにはMusashiは遠いし、上にモルタル引けばいいかと思い、その色で作業をすすめた。
そしてFRPはとんでもなく臭い。シンナー(?)の臭いかな。なんか、もう頭クラクラで気持ち悪い。しかもFRPはものすごくベトベトする。そしてすぐ乾いてしまうらしいから、急がないといけない。さらにもらった古いシートはぼろぼろだから、くっついて上手くFRPを塗れない。ものすごい色の青のFRPが体中にくっつき、臭いに頭がクラクラになり、何ともいえない苛立ちと気分の悪さ。
真ん中が凸凹になってしまい、良くないと思いながらも、もうどうしようもない。なんというものに手を出してしまったんだろうと二人で思いながら、とにかくはやく体を洗いたい一心でその日は引き上げた。
そして次の日、3時間で完全に乾くはずのFRPがまだベトベト。そしてまだ臭い。雨が降っているせいか、硬化剤が足りなかったのか、わからないし、直しようもないまま、とてつもない臭いの中家の作業を進める。

そして、あげくの果て、やっぱり真ん中が凸凹なのは問題だ・・・と様子を見に来てくれた知り合い。水がそこで水たまりになって流れなかったら、家の床とか、柱とか、蒸発したら天井とかが腐るらしい。家が一番早く悪くなる理由は水周りの問題。凸凹があるくらいならFRPしないほうが良かったねっと言われた。
あぁーーーーあ。
あの苦しみはいったいなんのために・・・
そもそもあんなに体に悪いものは環境にも悪いに決まってる。環境を考えて建ててる家なのに、なんで使ってしまったんだろう。お風呂の床の防水力をなるべくよくして、お風呂を早く完成させたいという気持ちが焦りを生んだのだろうか。あのFRPの青い色を見るたびに自分に対する腹立ちと、水周りの問題をどうするかで苦悩している。

とにかく、モルタルをできるだけ上手に塗って、床に傾斜をつけるように頑張るしかない。
夢のお風呂を中に入れる日はまだまだ先のよう・・・トッホホ。

Recently, we have been getting a lot of rain, everyday.... everyday.... My garden and our cabin construction site is drowning from it and we are stuck in the house and although we appreciated the break for a while, are getting quite bored of it.
Now that my dream bath has arrived, I am anxious to get it indoors into the bathroom. So, we started working on the bathroom floor. We used left over wood to make the floor as seen in the pictures above. Nothing too complicated, just like the living room floor.
We were instructed to put in the boards and then to cover the floor and half the wall with the water-proof tybec sheets we used for the outer walls. All seemed easy enough and after leaving a whole in the floor for the drain and a pipe that we can cut later, the floor was done quite quickly.
We planned to put some cement in on top of that, and call it a finished floor. But our recent friend advised that we could put in FRP to make the floor more water proof, since cement alone tends to leak. He had some old sheets of glass wool sheets for the FRP which were pretty worn out, but we had no idea what we were getting into, and were grateful for his advice and bought the materials and got to work.
The first shock came at the color of the FRP. Daisuke was tired or something, and bought a bright neon blue color FRP. FRP is often used to fix up surf boards, but I wouldn't have chosen this color even for a surf board. But, it was too far and too much trouble to exchange it at the store we bought it and we figured we can cover it with the cement that we had bought anyway, and got to work.
The second shock was the horrendous smell. I am sure this stuff is pretty toxic, cause after a few minutes of laying it down, I was feeling all dizzy. Plus the old sheets that were given to us kept sticking to the roller and things weren't going well at all.
But, there was no stopping since the instructions said this stuff hardens very quickly, and we were anxious to get finished with the awfully stickly and smelly job. Hard as I tried, I could not get the FRP to become completely flat, and so in the end, we had a bumpy finish in the middle. That, and a very dizzy, sticky, pissy, and probably high wife (that would be me) made us both want to be finished and out of the house.
I have never been high in my life, but this was probably as close as I have ever gotten to it. As much as my head hurt from the foul smell, I was obsessively fighting the little bumps that kept coming up no matter how much I fought it and no matter how much Daisuke told me to leave it.
Of course, the bumps mean trouble, and our friend who suggested it said that maybe it was better if we hadn't done it at all... which was disappointing after going through all of the horror mentioned above.
All we can do is make the cement cover as best we can and put a solid slope to it so the floor won't be full of puddles. That and hope for the best I guess.
I don't know why we decided to use such a thing that is probably bad for our health and the enviornment, but in our haste to finish the floor and to make it as best we could, we took the advise that is probably very good advise for people who know what they are doing. I don't know if I would try this again, but next time I do think I could do a better job... that and I would prepare a gas mask to do it.

2009年7月8日水曜日

窓 Windows

冬もキャビンを使えるように、窓は断熱性の高い二重になっているものをTres Homesを通してアメリカから輸入した。
キャビン作りの計画中に窓は輸入に時間がかかるから、去年の秋から決めて、一番最初の買い物だった。それが先日窓枠も完成して、ちょうどいいタイミングで届かれた。そしてこの窓が重いのなんの!どうしようと思っていたけど、大介父も手伝ってくれて、窓の片方を外すと随分軽くなって、3人で持ち上げることができた。
窓枠にスッポっとはめるとインパクトでサッシに付いてる穴を通して窓枠に繋げる。あとは防水テープで周りをタイベックに貼って、水の浸透を防ぐ。
気をつけるポイントと言えば、あんまりないけど、サッシの周りの外側にタイベックが乗るようにしたほうがいいから、はめ込む前にタッカーで止めた部分を外して(以下の写真)、入れる時に上手くタイベックを外に出す感じかな。

窓を入れてさらに家らしくなってきた。
外からの写真:
壁も着々と進んでるでしょ?

中はこんな感じ。

窓も入って、大介が目標としている、カマドウマが入ってこない家にもう一歩近づけたかな。:)


We imported our windows from the US, since the windows are better winterized and prices are reasonable. We ordered them last fall, and after we finished the window frames, the windows were delivered to us. To enjoy the outside green, we have a lot of windows in our small cabin ;)
Putting in the windows is not so hard, but the windows are reallllly heavy. We managed to put them in by taking one of the glass sides out, and also getting the man-power help from Daisuke's father. After we heave them into place, all we had to do was drill them in with the impact driver, and put water proof tape around the sides to keep the rain out. We were able to put most the windows in, but the ones for the upper section of the house need some more work with the framing, and we are going to wait for some professional advise on that.
Now that the windows are in, the cabin is looking more and more like a livable house. Although the windows seems larger and more open before the windows went in, we are very happy with our windows and the fact that they will keep the bugs out and the warmth in once the cabin is done.